C++ Beginner: Lesson 1 - Hello World application
Like every other programming language lesson series we will start with the "Hello World" application just to get a little bit familiar with the environment.
After downloading the Qt Creator as shown in the lesson 0 and installing it, in order to create a new project you need to click on File->New File or Project, or you can click directly on the New Project button on the welcome screen of the Qt Creator as shown in the figure 1.

Figure 1: Create new project
After following the step above, in the New Project window, in the Projects session we choose Application and middle session we choose Qt Widgets Application as shown in the figure 2.

Figure 2: Qt Widgets Application
In the next window, Qt Widgets Application, we determine the name of the project and the location where it will be created.

Figure 3: Name and location of the project
After we click next, we reach the "Kits" window. Regarding the "Kits" in the Qt Creator we will talk later when we will cover the corss platform ability of this IDE, for the moment we will leave the default kit selected, which should be the kit adequate for your operating system if you have choosen the correct version of Qt when you downloaded the Qt Creator during the lesson 0. In my case the default kit is Desktop Qt 5.6.0 MSVC2015 32bit as shown in the figure 4.

Figure 4: Kits window
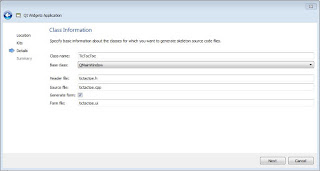
After we choose the kit that we will use in order to build and debug our application we reach the details window. In the details window are determined the name of the first structure which will be generated from Qt Creator, class name, base class that this class will extend, header file, source file and the form file if we would like to generated one. We live them default and the MainWindow class with related files will be generated.

Figure 5: Details window
The last window that we face before the project gets generated is the summary window. In this window can be added a version controller, and can be seen the files which will be generated from the Qt Creator after we click the finish button.

Figure 6: Summary window
As seen in the figure 7 the structure of a Qt Widgets Application consists in 5, where HelloWorldQt.pro file is a configuration file, mainwindow.h is the header file for the MainWindo class, mainwindow.cpp is the source file for the MainWindow class, main.cpp is the entry point of the application and mainwindow.ui is a file with xml content that stores the parameters of graphical interface for the MainWindow. We will seen more in deep the structure of these files in the next lesson.

Figure 7: The strucutre of a Qt Widgets Application
In order to create the graphical interface of the application we will use the design view of the Qt Creator which is shown in the figure 8.

Figure 8: Design view
In order to complete the HelloWorld lesson we will add a label which is found in the Display Widgets session on the left of the window when we are in the design view mode by dragging the element into the window situated in the center. To edit the text of the label we can dobule click on it and add the new text.
After completing the edition of the graphical interface we run the application by pressing the first green play button on the bottom left of the IDE. The result of the execution is shown in the figure 9.
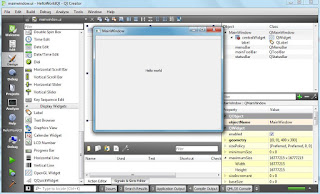
Figure 9: Hello world application
(please report broken link in the comment)
After downloading the Qt Creator as shown in the lesson 0 and installing it, in order to create a new project you need to click on File->New File or Project, or you can click directly on the New Project button on the welcome screen of the Qt Creator as shown in the figure 1.

Figure 1: Create new project
After following the step above, in the New Project window, in the Projects session we choose Application and middle session we choose Qt Widgets Application as shown in the figure 2.

Figure 2: Qt Widgets Application
In the next window, Qt Widgets Application, we determine the name of the project and the location where it will be created.

Figure 3: Name and location of the project
After we click next, we reach the "Kits" window. Regarding the "Kits" in the Qt Creator we will talk later when we will cover the corss platform ability of this IDE, for the moment we will leave the default kit selected, which should be the kit adequate for your operating system if you have choosen the correct version of Qt when you downloaded the Qt Creator during the lesson 0. In my case the default kit is Desktop Qt 5.6.0 MSVC2015 32bit as shown in the figure 4.
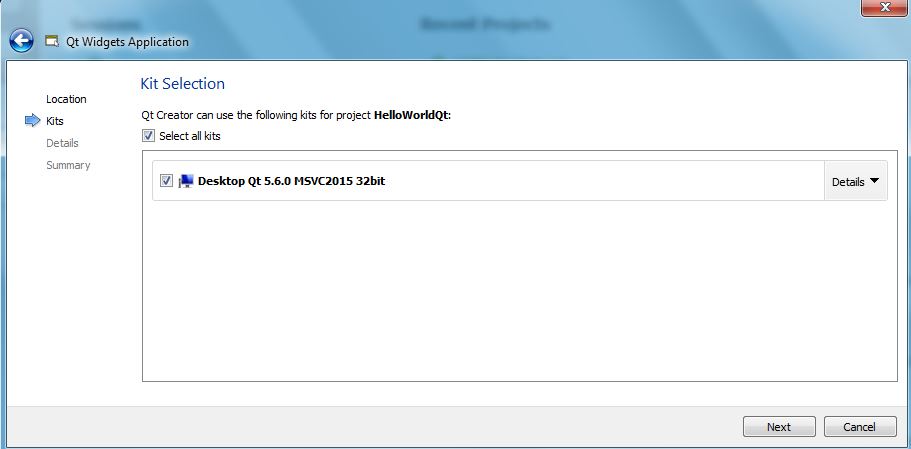
Figure 4: Kits window
After we choose the kit that we will use in order to build and debug our application we reach the details window. In the details window are determined the name of the first structure which will be generated from Qt Creator, class name, base class that this class will extend, header file, source file and the form file if we would like to generated one. We live them default and the MainWindow class with related files will be generated.

Figure 5: Details window
The last window that we face before the project gets generated is the summary window. In this window can be added a version controller, and can be seen the files which will be generated from the Qt Creator after we click the finish button.

Figure 6: Summary window
As seen in the figure 7 the structure of a Qt Widgets Application consists in 5, where HelloWorldQt.pro file is a configuration file, mainwindow.h is the header file for the MainWindo class, mainwindow.cpp is the source file for the MainWindow class, main.cpp is the entry point of the application and mainwindow.ui is a file with xml content that stores the parameters of graphical interface for the MainWindow. We will seen more in deep the structure of these files in the next lesson.

Figure 7: The strucutre of a Qt Widgets Application
In order to create the graphical interface of the application we will use the design view of the Qt Creator which is shown in the figure 8.

Figure 8: Design view
In order to complete the HelloWorld lesson we will add a label which is found in the Display Widgets session on the left of the window when we are in the design view mode by dragging the element into the window situated in the center. To edit the text of the label we can dobule click on it and add the new text.
After completing the edition of the graphical interface we run the application by pressing the first green play button on the bottom left of the IDE. The result of the execution is shown in the figure 9.
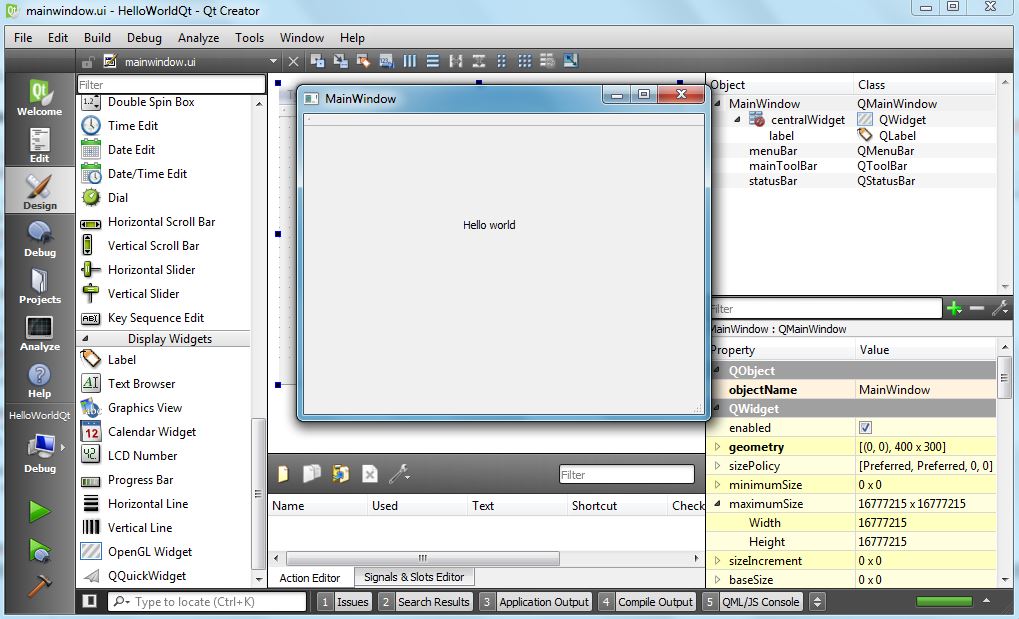
Figure 9: Hello world application
(please report broken link in the comment)


Comments
Post a Comment